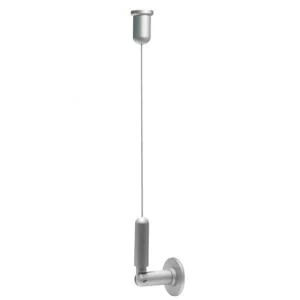
Ceiling to Wall Cables – Commonly used to suspend acrylic panels within Estate Agent ‘Walls’ – as a rule of thumb, you will need to order at least 2x units
Connection: Action 1 – Secure to ceiling area Action 2 – Decide on wanted cable length (cut as desired) Action 3 – Secure to wall
Top Tip: 1. Acrylic Panels & LED Panels, require 2x cables!
How to Use:
Step 1: Decide where the ceiling fixing is to be added, drill and raw plug, unscrew the top section and add a screw (supplied) secure to ceiling, then screw section with cable into this section, at this point you will have a cable hanging down. Step 2: Undo bottom section and add your own cable grippers – see ‘Related Products (if required) Step 3: Plumb cable and secure bottom section to wall, using raw plug & screw Step 4: Insert cable into bottom section, decide the length required of cable (nibble cable and repeat until you have the desired length) then, double check before cutting the cable as once cut, its cut! Step 5: Insert bottom section and tighten to tension the cable – that’s it Remember: To create a display, at least 2 of these kits are required to run either side of your poster holders.
Need more help? – Estate Agent Wall Displays – Consultation We fully understand that each Estate Agent have their own unique Window & Wall measurements as no building is identical To help solve this concern, follow these simple steps:
1. With this in mind UK Exhibition offer a “Free” cost calculation service: 2. Send an email to info@ukexhibition.co.uk 3. Tell us the wall(s) lengths and widths and of course the number of windows & walls required 4. Tell us if you want A4 Portrait or Landscape finishes 5. Tell us when you must have the products by 6. We will reply by email or direct call with your full costing…it’s that simple 7. By the way, on average we supply a minimum of 24 quotations per week and all for FREE